Encrypt files, such as Office files, archives, PDF document, is surely not so strange for computer user. They are usually encrypted with file creation tools, Microsoft Office, WinRAR, or Adobe Acrobat etc. So how is encrypting general files or folders not created with special file tools in Windows 10 computer?
When you have no idea to encrypt files or folders in new Windows 10 computer, please search "encrypt file" in Windows 10 Search box, there will be two options for you to choose. One is "Encrypt your offline files", the other is "Manage file encryption certificates". Believe these two options are the most appropriate options for us to choose now on computer if no password encryption tools available.
Therefore, if you have Windows 10 files or folders to encrypt, please follow several parts below to go.
- Part 1: Manage file encryption certificates in Windows 10
- Part 2: How to encrypt Windows 10 offline files
- Part 3: How to encrypt contents in file or folder to secure Windows 10 data
- Part 4: Encrypt Windows 10 files by preventing specific user from accessing specific files or folders
Part 1: Manage file encryption certificates in Windows 10
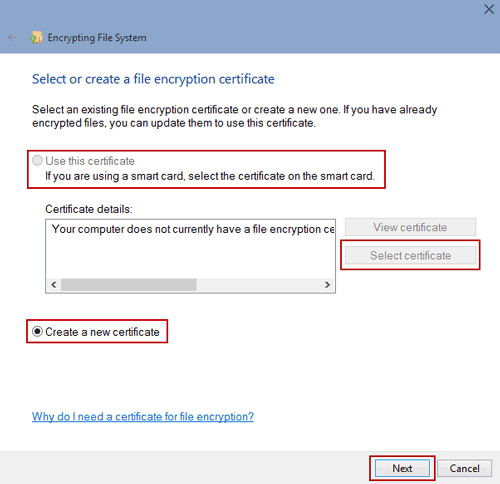
Once you choose "Manage file encryption certificates" after search, a new window would pop up and ask you to select or create a file encryption certificate.
If you have one created before, now check "Use this certificate" on interface and click "Select certificate" button to select one in pop-up dialog. Then it will be shown in "Certificate details".
However, if you have no file encryption certificate, please check "Create a new certificate" and click Next button to create a new one for Windows 10 first.
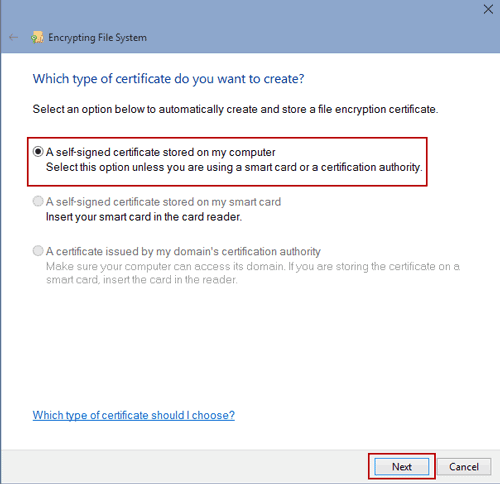
1. Select an option to automatically create and store a file encryption certificate.
Now we choose A self-signed certificate stored on my computer, because we have no smart card or certification authority. Click Next button.
3. If there have been encrypted files, select previous encrypted files and update them with new certificate and key. Or update them later is also permitted. Click Next.
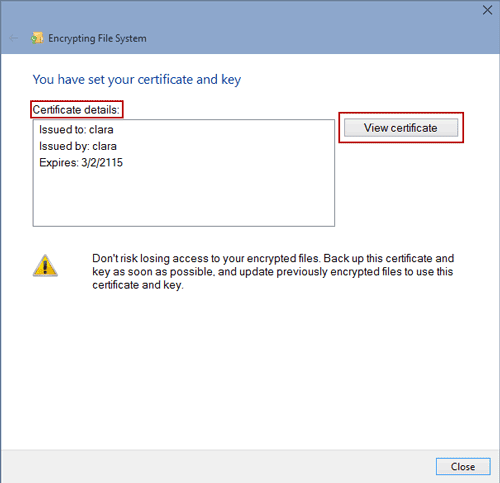
Certificate and key have been set successfully. Click View certificate and certificate detailed information will be shown in new dialog. Now you can click Close button to finish creating file encryption certificate. If file encryption certificates have not been back up, please read more about file encryption certificates backup for Windows 10 below.
Backup file encryption certificates
Backup file encryption certificates
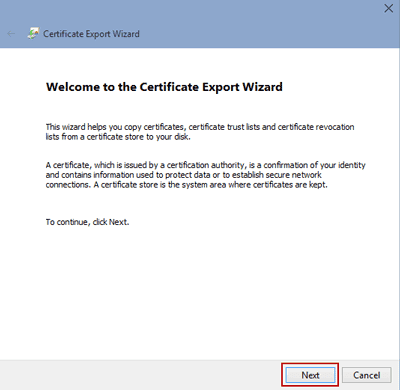
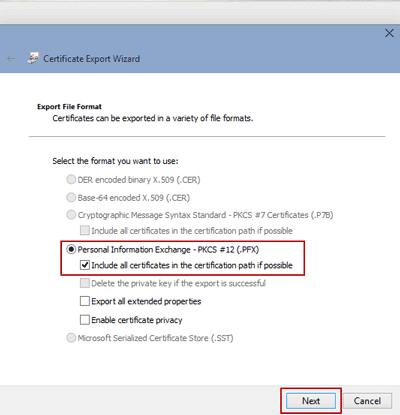
After creating file encryption certificate and it has not been back up, there will be a message prompting you to back up it on Windows interface. Choose "Back up now".
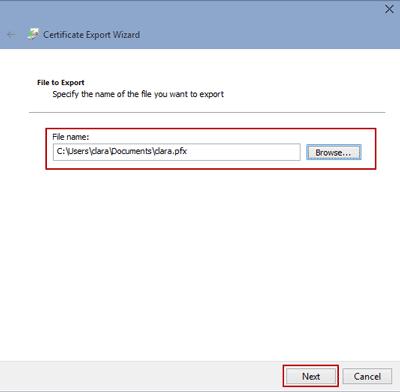
3. Set a password for certificate to protect the private key. Click Next.
5. When you see certificate export settings in new window, click Finish to complete the Certificate Export Wizard.
Part 2: How to encrypt Windows 10 offline files
1. Once you choose Encrypt your offline files, a new dialog Offline Files will appear.
2. Choose Encryption on menu, and click Encrypt tab. Click OK.
If you want to decrypt it later, just click "Unencrypt" tab next to "Encrypt". Then click OK.
2. Choose Encryption on menu, and click Encrypt tab. Click OK.
If you want to decrypt it later, just click "Unencrypt" tab next to "Encrypt". Then click OK.
Part 3: How to encrypt contents in file or folder to secure Windows 10 data
This way is intended to encrypt contents in file or folder with default file encryption certificates.
For example, you want to encrypt folder "Music". Now Music Properties dialog has appeared.
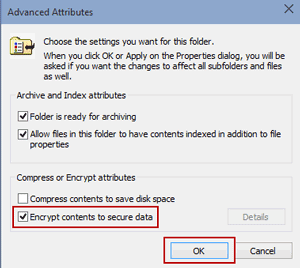
2. Under General tab, click Advanced option in Attributes.
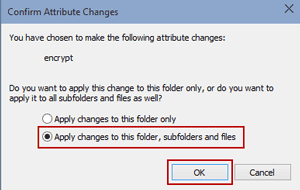
Wait for few seconds to apply changes to folder you choose.
5. Now click Advanced on Music Properties again. Click Details after Encrypt contents to secure data, you would see this folder is only available for user who make the changes to the folder.
So even though your computer is used by other computer users, this folder would not be accessed with permission.
Part 4: Encrypt Windows 10 files by preventing specific user from files or folders
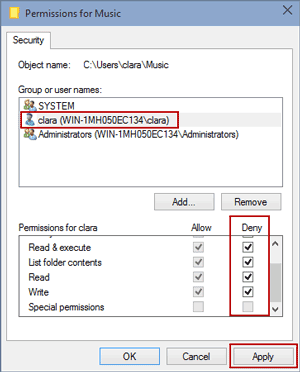
On folder Properties, you also can make specific permissions for specific user. Surely, you can deny access and editing on the folder.
1. Tab Security in Music Properties dialog. Select user who you want to change permissions. Then click Edit under Group or user names.
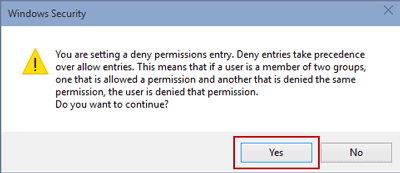
2. Confirm user in user group, and check all of permissions boxes under Deny in "Permissions for clara". Click Apply.
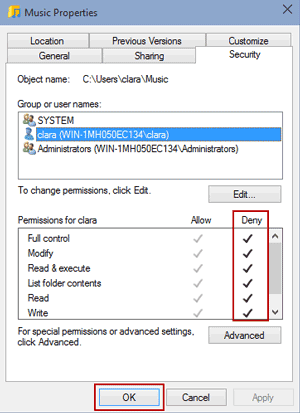
4. Click OK and turn back to Music Properties dialog, and you would see in Permissions for clara. All of permissions have been denied. Click OK.
Now no one could access this folder, unless who have made these changes removes all of permission protection from this folder.
Above passage has introduced how to encrypt Windows 10 files or folders or protect them with permissions from different point of views. If you still have any questions about encrypting specific files, such as encrypt Office files, PDF documents or archives, see articles below.
Related Articles:

