We may encounter file or physical errors on hard drive more or less. How can we fix the problems easily and safely? Check and fix errors on hard drive is an effective way for you to solve it. Now let’s see how to check errors on Windows 7 or Windows 8 hard drive, and then you can decide to fix them or not.
How to Check Windows 7 Hard Drive Errors
You can solve some computer problems by checking a drive or drives for errors. For example, you can check your computer's primary hard disk to fix some performance issues, or you can check an external hard drive if it's not working properly.
1. Click Start button and Computerto open Computer.
2. Choose the hard drive you want to check, and right click it to choose Properties.
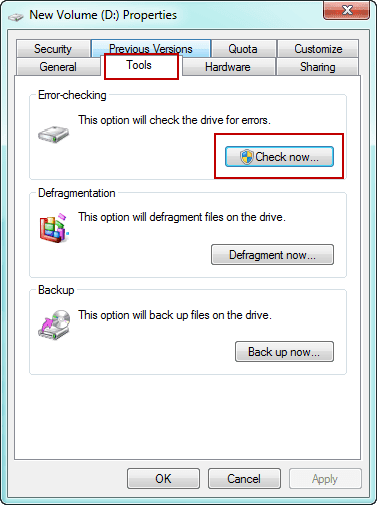
3. Click the Tools tab in Properties window, and under Error checking, click Check now.
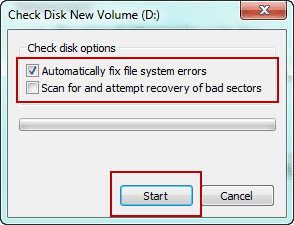
4. There are two options available for you to choose before starting checking disk.
- Automatically fix file system errors: automatically repair problems with files and folders that the scan detects.
- Scan for and attempt recovery of bad sectors: perform thorough check, this scan attempts to find and repair physical errors on the drive itself, and it can take much longer to complete.
If you want to check both file errors and physical errors, select both of them.
5. Click Start.
The process of hard drive checking may take several minutes, and this depends on the size of hard drive and which type of option you choose to check hard drive.
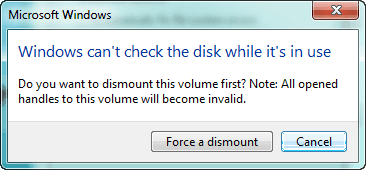
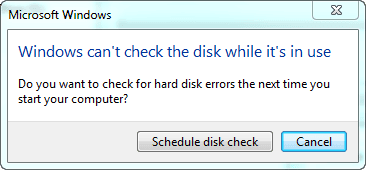
Tips: Please don’t do anything on the hard drive you are checking. And while hard drive is in use, Windows cannot check the disk.
At this time, if you cancel "Force a dismount", Windows will prompt you that if you want to check for hard disk errors the next time you start your computer. If you are sure, click "Schedule disk check". If not, click Cancel.
How to Check Windows 8 Hard Drive
Windows 8 can enable you to scan PC’s hard drive for potential problems. And generally, Windows 8 automatically scans each hard drive on your system on a regular basis. But you can manually scan a drive at any time. Now the following steps will guide you to scan and check hard drive errors on Windows 8 by yourself.
Step 1: Start Windows 8 and click Desktop in Start screen.
Step 2: Move your mouse to the upper right side of desktop. And type "Computer" in Search box.
Step 3: Click Computer in the left result to open Computer.
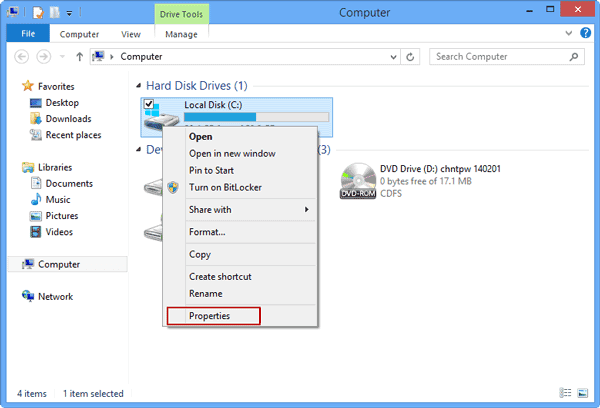
Step 4: Right click the hard drive you want to scan or check. And click Properties.
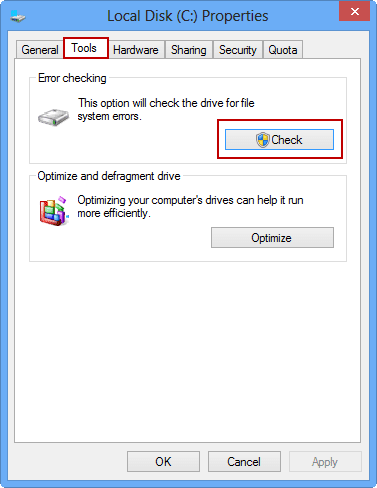
Step 5: Tab Tools, and under Error checking, click Check.
If there is no errors on this drive, you will be prompted with a message "You don’t need to scan this drive". Surely you can cancel hard drive check at this moment, or continuously scan hard drive.
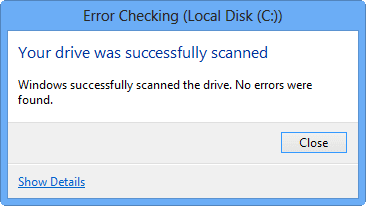
When you choose to scan disk, about few minutes later, you would see whether there are errors on hard disk and you should fix them.
Related Articles:
- Principles of Hard Disk Data/File Storage and Format
- How to Rename Hard Disk Partitions of Windows 7
- Measures to Prevent Data Loss after Hard Disk Formatting
- How to Recover Data from Formatted Hard Drive or Partition
- How to Remove Hard Drive Password on Acer Laptop

